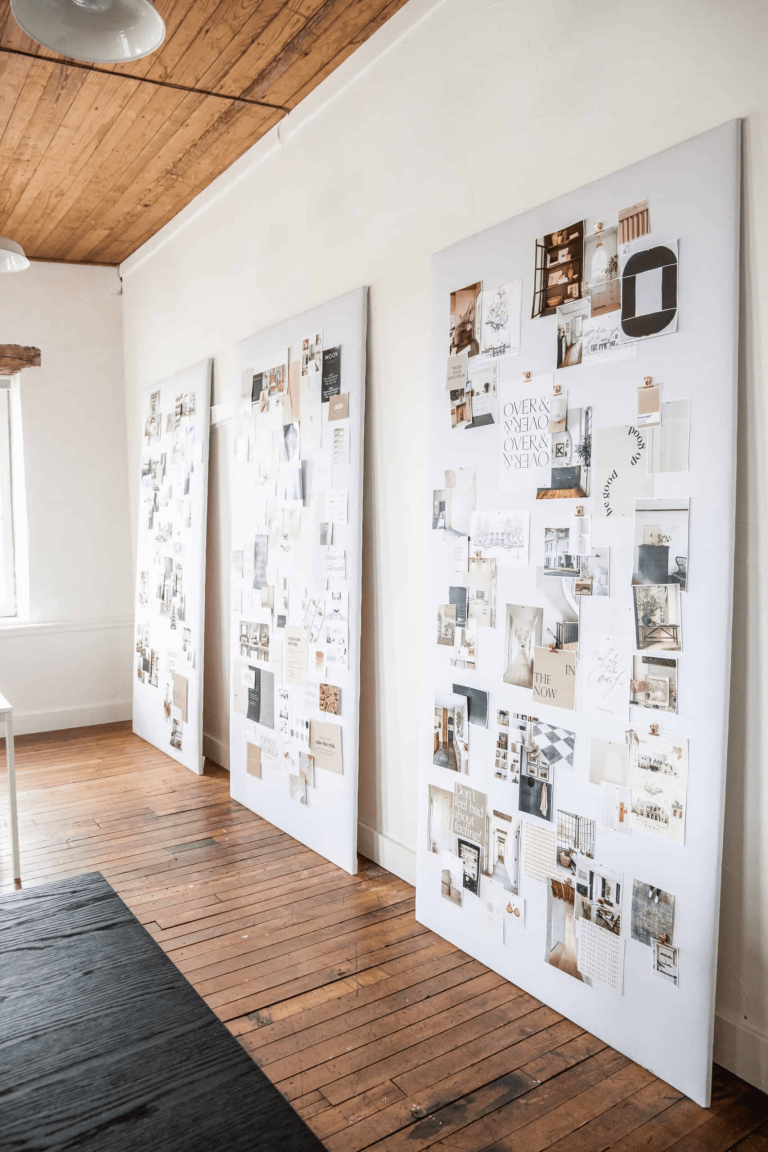
Having a large blank wall in your home or office space can create a design conundrum, especially if you're on a tight budget. Sophia Lee, interior designer and founder of By Sophia Lee, found a functional, inexpensive solution to this dilemma when she moved into her first office space.
“I had a bunch of walls that I didn't know what to do with, but I wanted to make something look really pretty,” Lee said. “Every time I started looking at the big artworks, I was like, 'That's thousands of dollars for each piece.'”
With expensive artwork out of the question, Lee, an avid Pinterest user, set out to create some inexpensive DIY wall decor to set the tone for her office. Lee says she's not a big DIY fan, so she needed a simple, low-effort project that she could complete on a tight budget.
Her solution? Three 8-foot-tall pinboards to display design inspiration. The concept is similar to a vision board, but it doubles as oversized wall decor in her office space. “I'm the biggest Pinterest user. I'm constantly pinning,” Lee says. “They're all so beautiful. They're on brand. Why not just create a big, life-sized Pinterest board?”
To recreate this vibe at home or in the office, follow Lee's easy steps to create your own realistic Pinterest board.
How to make a giant pinboard
All it takes is a few materials to create a life-sized Pinterest board at home, and Lee shares some easy steps to make your own.
Required Supplies
Plywood Fabric Batting Iron Stapler or staple gun Matching pins Wall mounting bracket (optional)
Step 1: Measure your space
Before you gather your materials and assemble your boards, you need to decide how big you want them to be. Because his office has high ceilings, Lee used three 4-by-8-foot pieces of plywood to cover most of the wall. Before you go to the hardware store, measure your space to determine the ideal size and number of pieces of plywood you need.
Step 2: Choose your fabric and filling
Once you have your plywood, head to your local fabric store and buy a roll of fluffy stuffing (the thicker the better) and some fabric to wrap around the plywood. Lee says the fabric should be large enough to cover the front of the board, with any excess fabric to wrap around the sides of the board. Lee chose a crisp white fabric so it wouldn't distract from the images you'll pin to your board, but feel free to choose a color or pattern that inspires you and matches your space.
Courtesy of Sophia Lee
Step 3: Assemble the board
When it comes to actually putting the board together, Lee says the order is important: First, lay the fabric sheet on the ground and make sure there's no wrinkles (you may need to iron the fabric first). Next, place the batting on top of the fabric. Depending on the size of your project, you may need to lay out multiple sheets of batting horizontally. Next, place the plywood in the middle of the fabric and batting. Use a stapler to staple the batting and fabric to the edge of the board. Fold the corners like you would fold gift wrapping paper for a clean, polished look.
Lee says the tighter you pull the fabric across the board as you staple it, the more professional the board will look. To achieve this, ask a friend to help you hold the fabric taut as you staple it to the back of the board.
Step 4: Add inspiration
Now comes the fun part: choose photos and quotes that fit the look you want to achieve. Stick to a color palette for a cohesive look, or choose similar photos or designs. Print them on cardstock (another way Lee gives her boards a more polished look) and hang them using small pins or clips. Purchase a pack of matching pins to create a cohesive aesthetic for your boards.
Lee also glues other materials, like fabric swatches and paint chips, to the boards to give them more texture and dimension, and she says she changes up the photos and other materials for each home she designs.
Step 5: Hang or display your board
Due to the board's large size, Lee leaned it against the wall instead of hanging it. If you have the space and want to hang the board, use a French cleat wall mounting bracket and a drill to attach the board to the wall. If you plan on hanging the board, be sure to use a stud finder to locate the studs in your wall. You can either drill into the studs or use drywall anchors if you can't find the studs.
Whether you hang them on brackets or lean them against a wall, these DIY life-size Pinterest boards are portable and can be easily moved around when you move locations. “Another great thing about them is that a lot of people are in places where they're not going to be there permanently,” Less says. “They can be moved from place to place.”

